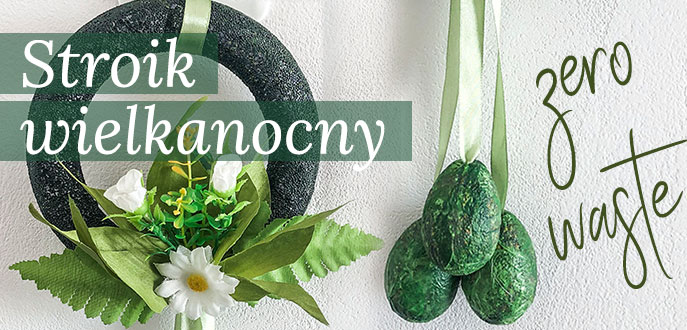
Reed Easter
Real zero waste! I was already supposed to throw it away, because the reed completely did not fit neither color nor texture to anything in my apartment. But I decided to do something out of rubbish, actually from what I already have and i haven’t bought a single new thing to restore it. So I didn’t spend money on this idea either, which I am very pleased about, because it’s the basis at this difficult time to use my resources wisely. The success of creation is when we do not have to buy more plastics, materials or tools, and I would like such successes appear as much as possible.
Corona virus did not give me too much opportunity. Easter 2020, however, must be at least a little festive. I looked for the small plastic resources I had. In the bathroom I found an old dried nail polish and the leftover of the remover, thanks to which I diluated it. In the old bag I found shreds of Easter napkins from last year and the old artificial flower from which I cut out the leaves.
Using the decoupage method, I glued purple eggs (I chose the green parts of napkins). With glue from the gun, I reconnected all the elements. Now eggs as a symbol of rebirth and fertility hang over the table in the kitchen between the lamps. Green color perfectly reflects the atmosphere of spring, which just comes.
Below is a list of all the things necessary to make an Easter reed:
- old reed
- old napkins, artificial leaves, flowers, crests
- decoupage adhesive
- brush
- old nail polish
- nail remover
- glue cartridge gun
- wooden toothpick
- thread and needle
- scissors and knife
How to make an Easter reed? Instructions below:
Step 1. Disconnect all reed elements. You can support yourself with scissors or knives
Step 2. Paint rim with nail polish.
Step 3. Grease the styrofoam eggs with glue and apply napkins.
Step 4. Wait until everything dry. Take the smell of nail polish to evaporate or ventilate the room.
Step 5. Cut and arrange the leaves in the composition. You can also help with a thread and a needle to sew some of the elements together.
Step 6. Heat the glue and glue all the elements to the reed. Puncture eggs with a toothpick. Place a droplet of glue at the egg’s hole and press here the ribbon by toothpick.
Step 7. Tie the ribbon at the top of the rim so that it can be possible to hung.
[…] Tutaj podsyłam link z innego posta, gdybyś potrzebował/a innych inspiracji do zerowaste. ZAJŻYJ TUTAJ […]